Sunday, November 27, 2011

A Holiday Gift Basket Giveaway!

Happy December everyone!  I'm super excited to announce Quarter Life Crisis's first giveaway!  In the spirit of the holidays, I'm giving away a little holiday gift basket, which contains the following items:


- Holly serving dish
- Holiday recipe holder
- Two (2) cookie cutters: star, bell

To win, just leave a comment below this post that answers the following question:

What is your favorite holiday movie?
(Mine is the stop-animation Rudolph movie)

But wait!  There's more!  To gain extra entries, leave a separate comment saying you've done the following (and if you already do one of the following, just say so in a comment):

- Follow Quarter Life Crisis on Twitter

- Like Quarter Life Crisis on Facebook

This gives you three entries and three possibilities to win this gift basket!  Here are the official rules:

Please leave only three (3) entries following the guidelines listed above.  1 winner will be chosen using the site random.org.  Please leave your email address/website in the comment section.  Winner will be notified by email or through their website and will have 7 days to claim prize.  In the event that the winner does not claim his/her prize in the allotted time frame another winner will be chosen using the same method.  Open to US residents only.  Registering under multiple email addresses or trying to gain extra entries will immediately get you disqualified from this and any future giveaways on Quarter Life Crisis.  Giveaway ends on December 9th.

Good luck!

Giveaway sponsored by Quarter Life Crisis

Friday, November 25, 2011

A Guest Post for Savour the Senses!


What on Earth am I going to do with all of these leftover apples?

Today I'm doing a guest post over at Jenny's blog, Savour the Senses.  I'm kicking off her new series "Featured Foodie Friday" and couldn't be more excited!!  Head on over to her delicious blog to see what after-Thanksgiving treat I baked up for all of you!  I'll give you a hint: it'll certainly keep you full and energized for that Black Friday shopping I know you're all doing today ;)

Also be sure to check out Quarter Life Crisis's new Facebook page!

Wednesday, November 23, 2011

Thanksgiving Thoughts

I really do love Thanksgiving.  My family keeps things relatively small since my aunts, uncles, and cousins live all over the country and my grandparents passed away years ago.  My mother's brother lives in Westchester, but we usually get together with them for Christmas.  Thanksgiving is spent at home with way too much food for four people and a voracious Golden Retriever.  It's nice not having to worry about getting the house ready or making a ton of food for a family of 13.  I can go an run a 5K in the morning and make a pecan pie at 12 in the afternoon.  The only thing you have to worry about is keeping Shadow off of the table ;)

I am thankful for so many things in my life, I don't even know where to begin.  I'm thankful to have parents that support and provide for me while I'm trying to navigate my way through my early twenties.  I'm thankful to have a brother that I can call a best friend, which I know many siblings cannot do.  I'm thankful for Shadow, who loves me unconditionally, is always happy to see me, and shows me how to be a fighter.

I'm thankful for all of my friends, old and new.  I am thankful for those friends that I don't talk to regularly but when we get together neither of us can stop talking about our lives.  I'm thankful for events like Alumni Weekend and Wildwood that allow me to connect with old friends that I do not get to see that often because of the distance between us.  I'm thankful for girlfriends I can squeal with and go shopping with and I'm thankful for guy-friends I can joke around and make a fool of myself with.  I am thankful for the people in my life that enrich my mind, listen to my issues, keep my secrets, and share my beliefs and values.  I hope to tell people that more often this holiday season.

It still hurts, but I am thankful for the time I had with Pat and for being able to call him a friend.  I'm thankful for the photos we took together, the ultimate we played together, and the trips we went on.  After all of this is over, I'm thankful to have the memories of our time together.

I'm thankful for this body that can run 5Ks in under 30 minutes and play ultimate all weekend.  I'm thankful for these hands that can craft, cook and bake, and write in this blog so I can share my story with everyone.

I'm thankful for everything I have learned while at Ramapo College, and for being able to get into the program at the last minute.  I am thankful for Michael who helped me through a very difficult time in my life.  I am thankful for having been able to go into classrooms and see methods and theories put into action.  And right now, I am so thankful to the Board of Ed and the people at Woodside who got me a student teaching position in a 5th grade class.

I feel like to say I'm blessed is sort of cheesy, and I feel like to say I'm lucky would be a jinx.  So I am just going to say I'm thankful to everyone (including my readers!) who have helped me become the person I am today.

Happy Thanksgiving everyone.


Saturday, November 19, 2011

Pumpkin Pie Spice

I feel sort of silly for posting a recipe for a spice.  But then again, I felt ridiculous telling you all how to make a milkshake with whisky in it.  I'm glad I did, though, because it actually seemed to be a huge hit.  It's awesome that I'm converting people into whisky lovers.  Come over to the smooth side my friends, it'll warm your soul.

Uhhmm.  Moving on.

I'm sure you've all seen recipes this fall that call for "pumpkin pie spice."  Well before you rush out to the store I want you to realize you probably have all of the ingredients for a pumpkin pie spice in your pantry.  It's so easy to mix them all together and throw them into pumpkin pies, apple pies, breads, muffins, doughnut holes, "drunken pumpkin" milkshakes (a friend of a friend suggested that title - how creative is that?!).  Store in a small jar or an empty spice container and you're all set for your Thanksgiving baking!

Pumpkin Pie Spice
Makes about 2 oz

Ingredients
- 3 tbsp ground cinnamon
- 2 tsp ground ginger
- 2 tsp ground nutmeg
- 1 ½ tsp ground allspice
- 1 ½ tsp ground cloves

Directions
Combine all ingredients in a small bowl and mix until completely combined.  Store in a small jar or spice container. 

Thursday, November 17, 2011

Grownup Pumpkin Pie Milkshakes

I'm going to take a break from inundating you with apple recipes and focus on another fall favorite: pumpkin.

One reason I love reading Jessica's blog is she surprises you with these posts featuring delicious drinks that are just as sweet as her desserts.  She'll turn desserts such as birthday cake and s'mores into these decadent drinks, and best of all you don't really need to add the alcohol.  But, I did.

Even though it's well into fall (and coming up on winter), these grownup pumpkin pie milkshakes are still in season.  The bourbon (we used whisky) and pumpkin flavors balance each other very nicely.  Plus they can literally be whipped up in a matter of minutes and would be very easy to serve at a holiday party.

Oh, and sorry for the lack of pictures.  The motive behind this recipe was to drink it immediately, not photograph it ;)


Grownup Pumpkin Pie Milkshakes
Makes enough for 2 milkshakes

Ingredients
- 2 c vanilla ice cream
- ½ c milk
- 1 tbsp vanilla extract
- 2/3 pureed pumpkin
- 2 tsp cinnamon
- 3 whole graham crackers
- bourbon or whisky (amount is optional, but 1.5 oz = 1 shot)

Directions
Place all ingredients in a blender and blend until well combined.  Pour into tumblers and top with whipped cream and cinnamon.  

Adapted from How Sweet It Is

Sunday, November 13, 2011

Baked Apple Oatmeal

You saw how I used that homemade apple cider, but what did I do with that applesauce that went along with it?

At the beginning of fall I saw a bunch of recipes for baked oatmeal.  I was intrigued and pinned one particular recipe to try for later.  Well fall went on and I sort of forgot about it, until I had this applesauce and nothing to do with it.

I tend to go through phases with what I eat.  There are certain foods I will absolutely binge on for weeks and even months until I get so sick of them I won't want to eat them anymore.  A pretty recent one has been tortilla chips with sour cream/salsa/shredded cheese dip.  A while ago I was making these grilled cheese sandwiches for lunch almost every day.  Sometimes, if someone picked up a particularly delicious cereal at the store that day, I wouldn't even wait until the morning to have a bowl of it.  For a couple of weeks in the summer I actually branched out from my milk and cereal breakfast and explored other options.  I would have half of a grapefruit sprinkled with about 1 tablespoon of sugar every morning (and I'd sometimes finish the other half for second breakfast.  Oh how I love my second breakfast).  For the next few weeks, I'd make oatmeal every morning and eat it like a hot cereal, sprinkled with brown sugar.  Once school started oatmeal seemed to time consuming, so I went back to my cold cereal and milk breakfasts.

This is a delicious way to make oatmeal.  It takes about 35 minutes to bake, so if you're planning on eating it before work I'd make it over the weekend or the night before - it still tastes great reheated.  The thing I love about this recipe is how versatile it is.  You can use almost any fruit with it or sprinkle nuts on top instead of brown sugar.  If you don't use applesauce, I would recommend lining the bottom of the pan with slices of fruit, like banana or peaches.  Any other fruit you decide to add can be sprinkled on the top.  I encourage you to experiment with many different flavors, let me know if you find one that you absolutely love!


Baked Apple Oatmeal
Makes enough for 1 8x8 in dish

Ingredients
- 1 ½ c old-fashioned oats
- ½ tsp baking powder
- ¾ tsp ground cinnamon
- pinch of salt
- ¼ c maple syrup
- 1 c milk
- 1 egg, slightly beaten
- 2 tbsp butter, melted and cooled.
- 1 tsp. vanilla extract
- 1 ½ c applesauce
- 2 tbsp brown sugar. 

Directions
Preheat oven to 375F and grease the bottom and sides of a 8x8 in pan.  In a bowl, combine the oats, baking powder, cinnamon, and salt.  In a separate bowl, combine the maple syrup, milk, egg, melted butter, and vanilla extract.  Spread the applesauce over the bottom of the pan, leaving a layer about a ¼ in thick.  Cover the fruit layer with the dry oats and then pour the liquid ingredients evenly over the oats.  Sprinkle brown sugar on top.  Bake for about 35 to 40 minutes, or until the top is golden brown.  Let cool before serving.

Adapted from Annie's Eats

Monday, November 7, 2011

Apple Cider Doughnut Holes

I have had zero experience with frying, unless you count bacon, in which case I have had tons of experience frying things.  Every time I've had to heat up oil for something, it's always too hot and the second I try to add something the oil spatters back in my face and burns what ever I'm trying to fry or sauté.  Not a fun experience to be sure.

Over the past couple of months I've been reading so many entries about doughnuts.  Buttermilk doughnuts, banana doughnuts, pina colada doughnuts, and finally apple cider doughnuts.  I knew I could simply drink the apple cider I made the other week, but what's the fun in that?  Why not reduce it, add it to some dough, and fry it up?  All of the recipes I had read made it sound so easy, it would be remiss of me to not give it a try.

Well, I am SO glad I did.  Frying is super easy!  I had about 2 quarts of shortening so I decided to use that instead of oil for my frying (less smoke than oil and honestly how much icing am I going to make from 2 quarts of shortening?).   To fry with shortening, you just have to melt it over medium heat, which takes a matter of minutes.  It'll start as this light golden color, but once it starts to get a little deeper in color and bubbles start to form then you know you're ready to go.  It takes some trial and error, but once you get your frying method down, everything comes out beautifully from there.

I originally wanted these to be real doughnuts and doughnut holes, but at 9:00 at night, rolling out the dough and cutting it into doughnuts seemed like too much of a hassle.  So I decided to spoon out the batter into the oil and just stick with the doughnut holes.  I made my own apple cider, I'm allowed to be a little lazy.   If you would like to go through all of that, simply flour a board and rolling pin, roll out the dough, and then used two different sized circle cookie cutters to cut out your doughnuts (the middle cutter should be about 2 inches smaller in diameter than the big cutter).  Save the circles you cut out of the center for the doughnut holes.

The first night I made these doughnuts, they came out kind of messy.  They were too big, so the insides wouldn't cook while the outside got a dark brown.  Plus they didn't have a very nice shape since I was using a spoon and then my finger to get the doughnuts off of the spoon.  I wasn't happy with the way they came out, but my friends definitely didn't seem to notice as we wolfed them down in less than an hour.  I saved the other half of the batter for the next day.

As I was heating my shortening and looking at my bowl of doughnut dough, I tried to come up with a better way of getting the dough from the bowl and into the sizzling oil in one, neatly formed ball.  Then it hit me: a melon baller!  DUH!!  The melon baller is the perfect size for making doughnut holes.  It may seem small, but the baking powder in the recipe causes the  doughnuts to expand a lot.  I got these perfectly sized doughnuts that were golden brown on the outside and fully cooked throughout.  I made about 3 dozen more in about an hour.  Well, 3 dozen minus about 6. maybe 8....

If the oil/shortening becomes dark while you're frying, throw it out and start over with new oil/shortening.  If the frying oil is dark it's usually a sign that it is too hot, which will result in unevenly fried doughnut holes.  You could also, of course, use a thermometer to make sure your oil doesn't dip below about 300F, but if you don't have a candy thermometer and aren't sure if you can stick your meat thermometer into sizzling shortening, just keep an eye on the color.  To keep the oil at a steady heat and to make things easier on yourself, only fry about 3 doughnut holes at a time.  This way, you can use a smaller pot and less frying oil and you can watch all of your doughnuts to make sure they come out golden brown.  Believe me, they need less than 3 minutes for each side if your oil is hot enough.
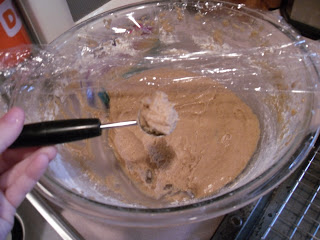
Please ignore the mutant doughnut. 

On a whim, either I or my mom bought this cinnamon sugar grinder, which worked perfectly for coating the doughnut holes.  You can roll your doughnut holes in ground cinnamon and sugar the second they come out of the frying pan, but I just used this grinder and sprinkled some cinnamon and sugar on my doughnuts.  Honestly, they were delicious either way.

So moral of the story, I came out of this frying experience unscathed!  These doughnut holes were so fun and easy to make.  This recipe makes a ton of doughnuts, so make sure you serve it at a place full of ravenous people, like an ultimate frisbee tournament (which ended up getting canceled for snow but most of the doughnuts were somehow snatched up anyways).  With the holidays right around the corner, this would be a cute thing to serve after Thanksgiving or even (dare I say it?) Christmas dinner - it would make an adorable edible centerpiece.  Happy frying!


Apple Cider Doughnut Holes
Makes about 4 dozen doughnut holes
Ingredients
-       2 cups apple cider
-       3 ½ c flour
-       2 tsp baking powder
-       1 tsp baking soda
-       1 ¼ tsp ground cinnamon
-       Dash nutmeg, allspice, cloves
-       ½ tsp salt
-       4 tbsp unsalted butter, room temperature
-       ½ c sugar
-       ½  c brown sugar
-       2 lg eggs, room temperature
-       1 ¼ tsp vanilla extract
-       ½ c buttermilk
Vegetable oil or shortening for frying

Directions
In a saucepan over medium heat, reduce the apple cider to about 1/3 c.  Set aside to cool.

Sift together flour, baking powder, baking soda, spices, and salt and set aside.

In a separate bowl, cream together the butter and the sugars.  Add the eggs, one at a time, and mix.  Mix in the vanilla.  Add the reduced apple cider, then add half of the dry mix.  Add the buttermilk, then add the remaining dry mix.  Chill the dough for about 20 minutes.

When ready to fry, heat a medium-sized skillet or pot over medium heat and add the oil or the shortening.  Remove the dough from the refrigerator and use a melon baller to scoop out the dough, dropping a few pieces into the oil at a time.  When the doughnut holes are golden brown (about 2 to 3 minutes each side), remove them from the oil and allow them to cool on a wire rack with a  paper towel underneath.  Roll in cinnamon and sugar if desired.  

Adapted from The Galley Gourmet

Thursday, November 3, 2011

Homemade Apple Cider and Applesauce

It seems like it was just last week that I was posting about how excited I was for the start of October.  Where does the time go?

So many apples!
Well, it's been about three weeks since I went apple picking.  I had more apples than I knew what to do with, so I wanted to try my hand at making my own apple cider.  I did some research online but all I was getting were posts about apple cider presses, which was something I was not about to invest in.  After much researching, I came across this article, which laid out a seemingly simple way to make apple cider.


Place the sieve over a bowl to extract the juice (back).
Reserve the pulp for applesauce!
It sounded easy enough: You core apples (you can even leave the skins on!), grind them in the blender until they turn to mush, and then pour the contents through a fine mesh sieve to extract the juice.  If you have a cheese cloth it certainly works best because you can squeeze the juice out of the pulp, but I did fine with my wire sieve and a spoon.  I then played around with the spices until I got the perfect taste and let the cider stew in my fridge for a couple of hours.  It was pretty simple and 9 apples got me 3 to 4 cups of apple cider.  So if you still have a ton of apples left over, I would certainly recommend trying your hand at making some apple cider.

Oh, and all of that pulp you made?  Throw in some of the same spices for the apple cider and you have homemade apple sauce.  How easy is that?


Homemade Apple Cider (and Applesauce)
Makes 3 to 4 cups

Ingredients
- 9 apples, cored
- 2 tsp ground cinnamon
- Dash nutmeg, allspice, and cloves

Directions
Pulverize the apples in a blender until pureed.  Pour contents into a mesh sieve over a bowl.  Let sit for about 10 minutes and use a spoon to help push the juices through.  Add the spices to the juice and store in refrigerator.  Reserve the pulp as applesauce.