Monday, June 25, 2012

Cucumber Salad

As the temperature rises, I think many of us are finding recipes to help cool us down.  And what could be cooler than a cucumber?

I made this recipe for my classy tailgate party, but I'm only getting around to it now because it's a perfect summer recipe.  My mom makes a killer potato salad recipe which is a favorite side in our house.  However, this salad comes pretty close to taking its place, especially if you're looking for a lighter salad.  The cucumbers are incredibly cool and refreshing, and the base is made with yogurt instead of mayonnaise, making it much healthier than your traditional potato salad (sorry Mom).

The trick to this recipe, though, is to let the cucumbers and the yogurt drain overnight.  Both of these foods hold a lot of liquid, and if you mix these ingredients together without removing some of the moisture first, you're going to end up with a very watery cucumber salad.

I love this summer side salad because it's light and refreshing, and is perfect alongside some burgers at a backyard grill.


Cucumber Salad
Serves 6
Prep Time: 6 hours (including time in refrigerator)
Ingredients
-     4 cucumbers, thinly sliced
-     ½ red onion, thinly sliced
-     1½ tsp salt
-     4 c (32 oz) whole milk yogurt
-     ½ c (8 oz) sour cream
-     2 tbsp white wine vinegar
-     ½ c fresh dill, minced
-     1½ tsp ground black pepper

Directions
In a colander lined with a paper towel, combine the sliced cucumbers, red onion, and salt.  Place the colander over a large mixing bowl and wrap the bowl and colander in plastic wrap.  Place in the fridge and allow to sit for 4 hours (or overnight).

Pour the whole milk yogurt into a fine mesh sieve lined with a paper towel.  Place sieve over a bowl and cover both with plastic wrap.  Place in the fridge and allow to sit for 4 hours (or overnight). 

Press the cucumbers in the paper towel to remove any leftover water.  Pour the cucumbers and yogurt in a bowl and combine with the sour cream, vinegar, dill, and pepper.  Toss and place in the fridge for 1 – 2 hours.  Serve cold.

Slightly adapted from Ina Garten

Wednesday, June 20, 2012

Hilton Head Island: Places to Eat

As promised, here are my family's favorite restaurants on Hilton Head Island.

Hudson's Seafood on the Docks

This could easily be our family's favorite restaurant.  The location is wonderful, and you won't even mind waiting for your table with all of the outside attractions.  Take a look at the old shrimping boats, have a drink at the bar, and relax while listening to live music on certain nights.  Once your table is called, you'll be served with hushpuppies instead of bread.  For those of you who have no had a hushpuppy, you're missing out.  And Hudson's makes the best hushpuppies.  They're sweet and savory at the same time, and the outside is crispy while the inside is incredibly fluffy.  I could have eaten the whole basket.

When it comes to the entrees, there are your classic staples: oysters, shrimp, scallops, and fish.  My favorite dish is the combination platter because you can choose two of the above, and have 4 different options of how you'd like them prepared.  The fried oysters are by far the best, but I ordered the pan sauteed scallops as well (such a good choice).  The fish specials are pretty remarkable too, so make sure to check those out.  This is easily the best seafood you will find on the island.

The Crazy Crab

You go to the crazy crab for one thing: the atmosphere.  The place is filled with mismatched ocean paraphernalia, but the best part of the restaurant is the crazy crab himself, sporting a hat similar to that of that of Gordon of Gordon's Fisherman.  It's a fun, family-friendly place to spend the night, and both restaurants are located on prime spots on the island.  The Crazy Crab on the north end of the island has outdoor seating where you can watch crazy crab races and watch the sunset over the low country.  Meanwhile, the Crazy Crab on the south end of the island in Sea Pines is a wonderful locale where you can walk around and look at all of the shoppes before and after dinner.  I have been to both locations and have enjoyed my meal and experience at each one.

Like every restaurant, the Crazy Crab serves hushpuppies within its bread basket.  The hushpuppies aren't as tasty as the ones at Hudson's, but they do serve them with a delicious brown sugar/maple butter.  Like at Hudson's, though, you definitely need to go with the combo platter, whether it be the fried or broiled one, depending on what you're in the mood for.  I had the fried oysters and scallops, which were both delicious and cooked very well, especially the oysters.  My parents had the broiled dish, which they said was a perfect and equally satisfying alternative to the fried food.  The Crazy Crab offers a wide selection, and the atmosphere makes it a destination you should certainly visit while on Hilton Head.

The Sea Shack

The Sea Shack boasts itself as "the place the locals go," which is exactly what you'll find.  Here's a tip about the Sea Shack: get there early, or else wait on line outside for at least 45 minutes.  Once, our family did call ahead for take out, but when you go there you will actually be able to see the daily offerings for sides and specials.  The first time we went to the Sea Shack this trip, we went for dinner.  It was the middle of the week and I was getting a little tired of fried food, so I decided to get grilled fish and shrimp.  Such a good choice!  The shrimp were seasoned and grilled to perfection.  My brother had the blackened fish and agreed that the amount of seasoning was perfect.  The Sea Shack will give you a lot of food with your order, and all for an incredibly reasonable price.

Which is why we went back for lunch the next day.

If you choose to do this as well, you need to get a Po' Boy.  This version of a Southern hero is incredibly simple but delicious.  My mom, brother, and I each got one, and all of us devoured our sandwiches without saying a word.  In fact, I completely forgot to snap a picture I couldn't wait to eat it.  All of the variations of the Po' Boys are delicious, and like the platters you can get them grilled, blackened, or fried.  And unlike at other places, the Sea Shack isn't stingy with the amount of seafood they put on your Po' Boy.  If you plan on eating dinner in one night, make sure you treat yourself to some Po' Boys at the Sea Shack.


There are a myriad of other restaurants on the island, but these are the seafood ones that my family goes to most often.  These restaurants should not be missed if you ever get a chance to visit Hilton Head Island.  I hope these past two posts have convinced you to take a trip to Hilton Head, my family has spent the past 4 years vacationing there and we've loved every trip.

Monday, June 18, 2012

Hilton Head Island: Things to Do

Hilton Head has been my family's vacation spot for the past 5 years.  I have always loved going there, relaxing on their beaches, riding my bike all over the island, and eating more fried seafood and drinking more sweet tea than my body can handle (don't ask...).  When I tell people about Hilton Head, some people actually have no idea what I'm talking about, while others express their desire to go there someday.  In order to help those that want to go to Hilton Head one day (and maybe convince those who have no idea what I'm talking about), I want to share some of my family's favorite things to do and see, and places to eat of course.  I'll be splitting it up into two posts, though, because it's much too much to put into one.  So first, I would like to share some things you and your family need to do while on Hilton Head Island.
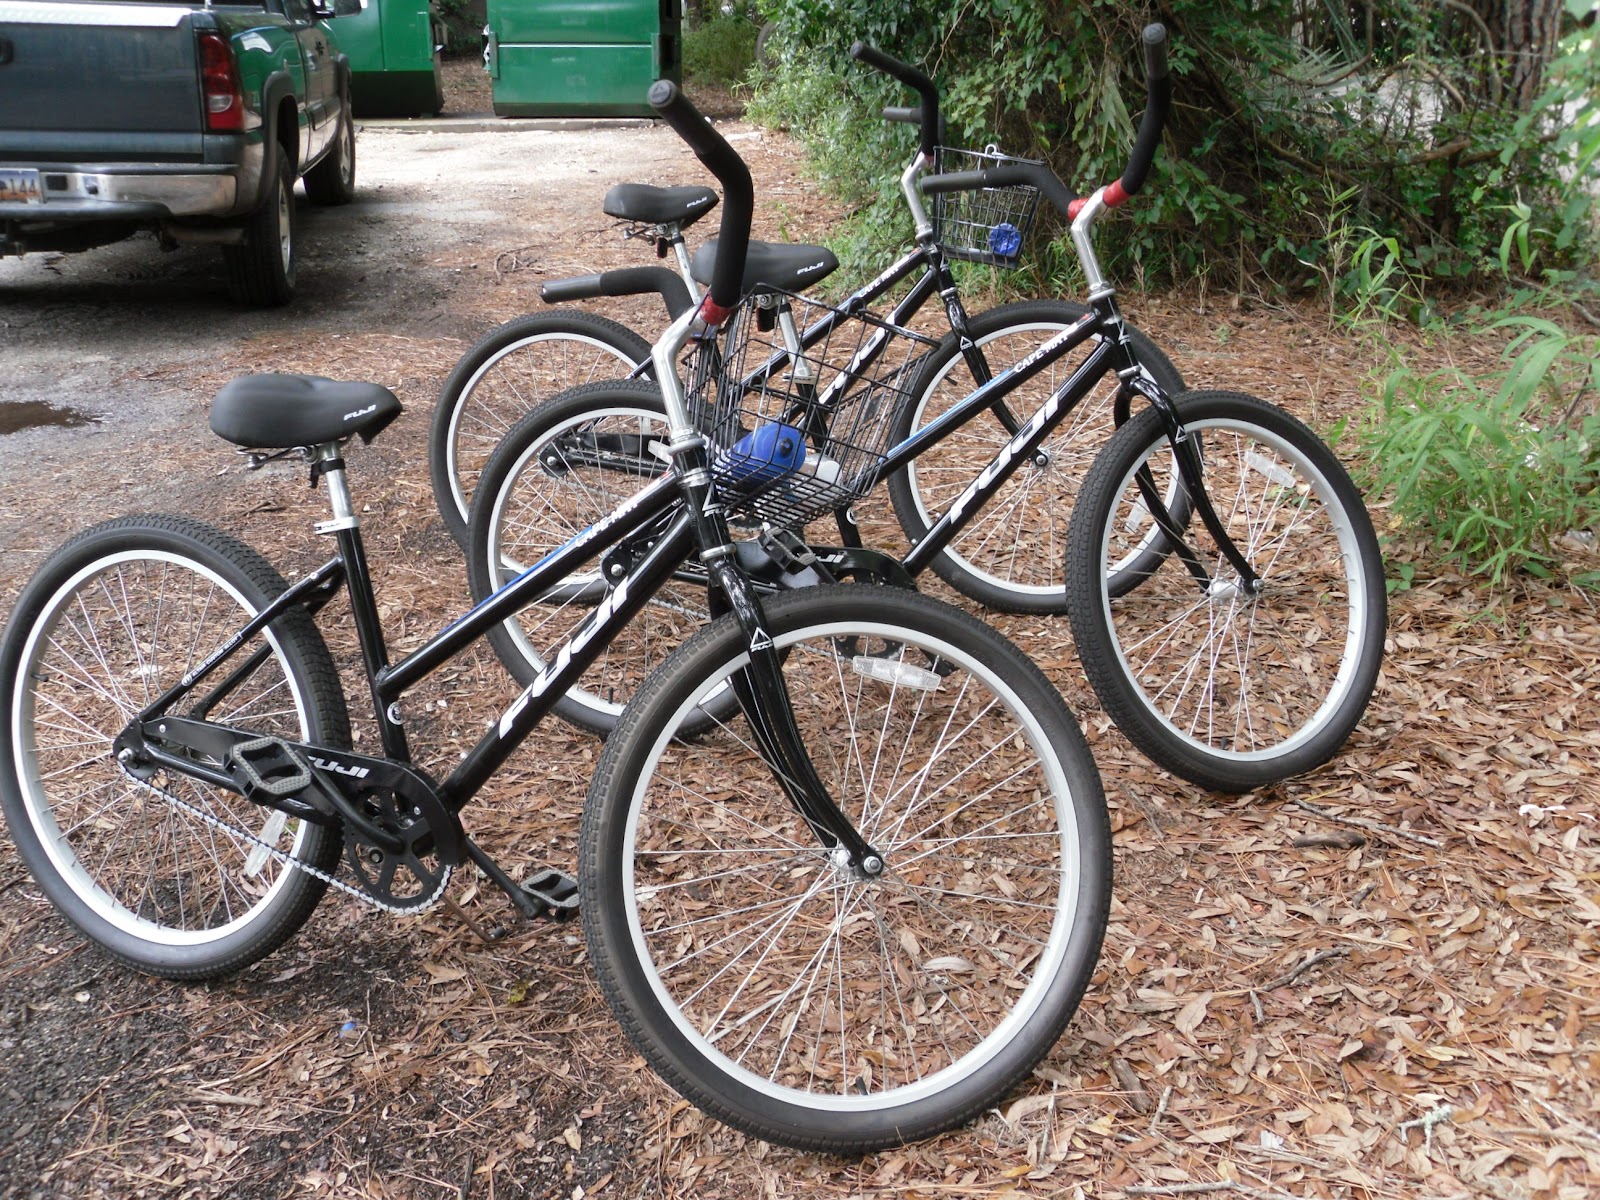
Renting Bikes


The first thing you need to do when you arrive at the island is rent bikes from one of the local bike shops.  You can even find some bike shops that will deliver and pick up the bikes for you!  The island was made for bikers, and there are paths all over the island that are wide enough for two lanes of bikers, riding single file.  When you head out, be sure to grab a map of the bike paths, although there will be some maps posted up at various points throughout the island.

Biking is also the best way to view the island, both on the mainland and on the beach.  If you'd like to take the bikes on the beach, make sure you go at low tide, and keep the bikes out of the water!  The salt water will rust the wheels and spokes and some companies will charge if they've noticed you've taken the bikes in the water.  If you go during low tide, though, you should have no trouble at all.  The sand is packed so it is like riding on asphalt.  Except there's one thing: when you start riding, make sure you're riding against the wind.  That way, when you ride back, the wind will be at your back and it'll make for a MUCH easier ride.  Trust me on this one.


On the mainland, be sure to stop at some of the bridges and take a look at the gators and turtles in the ponds.  The turtles will come right up to the bridge because they're so used to people feeding them (please don't), but you'll have to look closer for the gators.  Please be smart and stay on the bridge while you view the gators, although most of them are still pretty small.  I heard a rumor last summer that they take the largest gators off the island.  However, the Sea Shack does serve alligator...and speaking of the Sea Shack, be sure to grab your bike locks and bike to a local restaurant for lunch.

Savannah, Georgia

It's hard to believe that Hilton Head is right across the water from Savannah, Georgia.  Therefore, this is a destination you cannot miss!  I could spend a whole series of posts on Savannah, but instead, I'm going to tell you about the places my family visited this year.

First, though, I must say that one of the best ways to see the city is through a trolley tour.  Sure, it's incredibly touristy, but the trolley tours are run very well and they will bring you to all of the spots you should hope to visit while in Savannah.  Make sure you book with a company that allows a hop on/hop off system, so you can walk around the city at your leisure as well.  My family and I did this last year and we loved it.

Now, some of you may know that I am a Paula Deen fan.  I love her story, I love her cooking, and I love her personality.  She's a riot to watch and she knows her food isn't good for you, it's just good.  Therefore, we just had to make a reservation at her restaurant.  Before I went, I checked some reviews out of curiosity's sake, and to be honest they were not pleasant.  The problem is, people see a celebrity chef and expect celebrity, gourmet food.  Do not go to Paula's restaurant expecting that.  She's going to serve what she makes on TV - down to Earth, greasy, fried, delicious comfort food.

Make sure that if you do visit The Lady and Sons, you make a reservation.  Even with a reservation, you'll need to wait in the waiting area for a short while.  But the waiting area is next to the gift shop (Paula knows how to market herself), so take the time to look through the cookbooks and decide whether or not she actually did sign each one of them...

The waiter comes out with a tray of garlic and cheddar cheese biscuits (amazing) and hot cakes and will give you one of each.  The menu isn't too large, but there are some very tasty options.  I decided I wanted a whole smattering of Southern foods and chose to go for the buffet.  My mother and brother ordered pulled pork sandwiches, which they said were wonderfully seasoned and tender.  The items from the buffet are the classics you find on her show: fried and baked chicken, greens, black eyed peas, mashed potatoes, creamed corn (my fave).  There's nothing that will knock you out of the park, but it is comfort food at its finest.  There's also a little salad bar in the buffet so you don't feel totally guilty about the things you're eating.  The waiters make sure to keep your sweet teas overflowing, and will even send you home with a drink to go.


Not only did the buffet include classic Southern comfort foods, but it included desserts as well and I had been eyeing Paula's Gooey Butter Cake, which I saw in her menu and could not get out of my mind the entire time we were there.  When the waiter brought around the dessert selections, I saw the butter cake was actually a chocolate butter cake, and sensing I was a little disappointed the waiter offered to find the original kind.  He brought out a small square for me and I started nibbling on it immediately.  The cake is everything I wanted and more - a caramelized base, gooey center, and a light crust.  I left a tiny bit for my family to try, and was barely able to snap a picture of it before they devoured it.

The Lady and Sons is certainly a tourist destination, but it's much more agreeable than the reviews all said.  The waitstaff is incredibly friendly, and if you're lucky enough to be seated on the second or third floor the atmosphere is very nice.  Don't go in expecting celebrity worthy food - go in expecting the things you see on Paula's show - down to Earth comfort food.  You will not be disappointed.  And plan to do some walking afterward, your stomach will thank you.  And no, that is sadly not the real Paula Deen, because if it was I would probably be crying in that picture.  Does anyone else have that reaction when they see celebrities?

Afterwards, be sure to hit the City Market to eye the treats at the Candy Kitchen and check out some local artists.  The waterfront is beautiful as well, yet we had to miss it this trip due to the rain.


Kayaking in the Low Country

One thing you cannot miss when coming to Hilton Head is the kayaking.  Many companies boast kayaking or boating tours in which you can spot dolphins.  If you've never been kayaking before, I would suggest taking a kayaking tour, more for safety reasons than anything else.  If you have been kayaking before, go ahead and rent the kayaks by the hour and go dolphin hunting on your own.  One place that my family and I like to go to is Outside Hilton Head.  It's almost impossible to get to, since it's tucked away in the Shelter Cove Harbor/Resort, but it's really worth it.  Keep following signs for Elia's Grill and you'll find it.  The reason we love this particular company is because of the location.  There are lots of marshes for you and your family to explore, and every time we went we managed to find dolphins!  The dolphins will come fairly close to your boat, but don't do anything silly like trying to grab/feed them or sticking your hands in the water.  Even if you don't see dolphins, my family and I loved paddling through the marshes and looking at the crabs, fish, and birds.  Also, make sure you get there early so you can see lots of animal action and assure there will be a kayak waiting for you!

Sea Pines

Sea Pines is a gated community on the south tip of Hilton Head Island.  It does cost $5 to get in, so make sure you get there somewhat early so you can get your money's worth.  As you're driving down N Sea Pines Drive, you're going to come up to Lighthouse Road on your right.  If you take that, it'll take you to the lighthouse and Harbour Town, which is a beautiful spot to walk around, snap some photos, and see the lighthouse and boats.  This is also where the Crazy Crab is located, as well as a few other notable restaurants.  This area is also ideal for its shopping, and it's where you're going to want to pick up your souvenirs.  Should you continue going straight down N Sea Pines Drive, you'll eventually end up at the Salty Dog - a place you must visit if you have a salty dog back at your hotel/villa or back home.  They have souvenirs for your pup and you, and last year we bought Shadow a very nice collar. My family and I visited the Wreck at the Salty Dog for some bar food, and it was pretty decent.  Make sure you get the outdoor seating - this restaurant is at the very bottom of Hilton Head Island!


There are of course places you can play tennis and golf (I know for a fact there are free tennis courts), charter boats and go on fishing expeditions, or just simply relax on the beach.  There are a myriad of things to do on Hilton Head, but I wanted to highlight some of my family's favorites.  I hope they become your family's favorites as well!  Check back Wednesday for the second part: places to eat!

Friday, June 15, 2012

How-to Track Your Workouts

I haven't posted a workout post in a while, so I wanted to share something that seems second nature to me, but could vastly improve your workouts should you not do this already.

I keep track of my workouts in a Google Spreadsheet.  Let me explain...

(Note: Please click on the image in order to see a larger view)

When I open my Google spreadsheet, this is what I see (going across the columns): the date, the planned workout, how I felt before the workout, details of the workout itself, and how I felt/recovered after the workout. 

Doing something as simple as organizing my workouts has improved my workouts immensely.  Here's why:

I can see how well I've done

When I complete a run, sprint workout, gym workout, etc., I make sure to compare my results to the last time I completed that same workout.  For example, after completing a three mile run, I would go back through my log and search for my last 3 mile run.  Next to my current time, I would mark whether this time was longer or shorter than my last 3 mile run.  If it's shorter, it boosts my confidence, and I can start to judge when I can up my mileage.  If it's longer, it kicks my butt into gear, and I can move forward with an adjusted training plan. 

I can see what needs to be done

One of my biggest mistakes when I first started working out is I didn't rotate my workouts.  For example, I would spend the entire week doing 3 mile runs because I wanted to increase my endurance, and yet I wouldn't see any results.  I realized I needed to incorporate sprints, strength training, and cross training into my workouts in order to prevent my body from falling into muscle repetition (doing the same thing over and over) and becoming fatigued.  So, I now will rotate between long runs, sprints, and biking.  When I go to the gym, I rotate between leg, arm, back, and core workouts.  And when I sprint, I rotate between intervals, ladders, and regular sprints.  This would be almost impossible to keep track of if I didn't have this spreadsheet handy.  I can see what needs to be done next in order to vary my workouts and improve my athleticism.  

I can prevent injuries

If you look closely, you can see I injured my IT band.  This happened in our first ultimate tournament, when I played almost every single point for 8 games.  IT band injuries are also known as "runner's knee," and the most common cause is overuse.  After looking up some IT band strengthening exercises, I looked where I could incorporate them into my current workouts.  This will hopefully prevent any further injury, and many of my workouts are categorized under "cross training," since I'm aiming to keep it easy (and also because I'm on vacation...).  When I begin running and sprinting again, I can mark how my IT band felt during and after my workout in this chart, and this will help me decide whether I should scale back or keep going with my current workout plan.  Also, if I notice that one muscle is more sore than usual after a workout, I can keep an eye on that in order to prevent an injury in the future.  And should I become injured,  I can look back and see where it started in order to help better diagnose the issue (which ultimately should be done by a doctor, I just like to have an idea of what's going on with me).  


The share options


This is more why I choose using Google Docs instead of a regular spreadsheet.  If you decided to make a workout plan with someone else, you can share your spreadsheet with them, as long as they have a Google account.  So, if you and a friend are getting in shape for summer together, the two of you can have the same exact workouts, but keep your information on separate sheets.  When I shared this document with someone, it was an extra motivator to complete the workouts because I felt accountable to someone else.  Plus, if you're any bit competitive like myself, you're going to be checking your friend's progress and spur yourself to keep up with him/her, or continue doing better ;)


I can't imagine what my workout plan would look like if I didn't keep track of it.  It'll improve your workout routine exponentially, and you can see what needs to be done, how far you've come, and how you can help prevent injuries.  I have found that this little technique has vastly improved my workouts, and I hope you set up your own!

Tuesday, June 12, 2012

Chicken and Cheese Quesadillas

This isn't your normal quesadilla that you can whip up in your quesadilla maker (one of my favorite Christmas presents).  This is a creamy, cheesy quesadilla thanks to the help of condensed cheddar cheese soup.  I'm pretty sure that this isn't "soup" and that Campbell's only makes it to stir into other dishes.

We were going to use the recipe on Campbell's site, but when I got to the part that said "serving suggestion: serve with chocolate chip cookies" I started to wonder if there was a healthier way we could make this dish.  We decided to keep the soup, but created our own recipe that seemed a bit healthier.

I found the easiest way to assemble these quesadillas was to spoon the mixture almost in the center of the tortilla.  I then brushed the edges with water and pulled them up and together, using my fingers to pinch the edges.  They won't stick together perfectly, but as long as you create somewhat of a seal the quesadillas should be fine.

The thing that I love about this recipe is how quickly it can be whipped up, making it that perfect weeknight meal.  Adding fresh vegetables and meat makes this a healthier meal, and the cheddar cheese "soup" makes for an incredibly cheesy and creamy quesadilla.  Serve it with a side of brown rice and a salad and you have a quick and easy weeknight meal!


Chicken and Cheese Quesadillas
Serves 4 – 5
Prep Time: 25 min
Cook Time: 20 min

Ingredients
-     1 lb boneless, skinless chicken breasts, cubed
-     1 (10.5 oz) can condensed cheddar cheese soup
-     2 tbsp milk
-     1 lg tomato
-     1 each of orange, red, and green pepper, diced
-     3 stalks green onions, diced
-   1 bag 10" tortillas
-      salsa and sour cream for dipping

Directions
Preheat the oven to 425F.

Cook the cubed chicken in a medium pan over medium heat until the chicken is lightly browned on all sides.  Stir in the soup and vegetables.  If the cheese mixture seems thick, add the milk as needed until it is creamy.  Allow to cook until bubbling and then remove from heat.

Lay the tortillas on a baking sheet and spread the chicken and cheese mixture onto half of the tortilla, leaving about ¼ in around the edges.  Brush the edges with water and fold one half over the other.  Press the edges together to create a seal.  Bake for 5 min.  Serve immediately with sour cream and salsa.
  

Saturday, June 9, 2012

Quarter Life Weekend Updates

I wanted to start a new series to give the blog a more central theme again.  I have loved writing in this blog because it has given me a creative outlet to explore all different areas as I journey through my quarter life crisis.  I have learned how to cook and bake, made lovely homemade gifts for others, found a love for running and being healthy, and met people whose words and encouragements inspired me at my lowest points.  I have also been able to express some thoughts about teaching (my new life path), which may increase in the very near future...

The main reason why I started this blog, though, is to share with others in their quarter life that it is ok to not have your life all figured out after graduating college.  I had hoped that my story would inspire others to make changes in their lives to better themselves and to follow their hearts, even though these changes may be drastic and scary.  In the hope to continue to inspire others, I wanted to create this Quarter Life Weekend Update series.  It may not be every weekend, but I wanted to have a place where I could talk about the challenges I have faced during my quarter life in hopes that others with similar stories will be able to find a place to relate and discuss.  Let's begin...

Someone once asked me the following question:

"At what point in your life do you consider yourself to be an adult?"

Is it when you graduate college?  Move into your own place?  Start your career?  Get married?  Or is it defined by something like age? 

For me, I believe I won't truly feel like an adult until I do two of those things: moving into my own place and starting my career.  And right now, I'm doing one of them. 

A few weeks ago, I had an insanely busy week.  In one day, I had a demo lesson for a middle school science position and a second interview for an elementary position.  I felt that both went well, and they said by the end of the week they would call me with an answer.  I was thrilled with the fact that my job search could be over so suddenly, which is somewhat unheard of in the teaching field.  I didn't want to get ahead of myself, but I began to imagine what it would be like to work in either position.  

I received a part-time offer at the elementary school, but unfortunately I had to turn it down.  The school is 1 1/2 hours away, and a part time salary would not have been sufficient to cover the costs of living out there.  I was disappointed it didn't work out, but I was also relieved that I wouldn't have to make a difficult choice.  If the right job was offered to me, would I have taken it and moved 1 1/2 hours towards the Pennsylvania border?  It was something that had kept me up the entire night before, because I did not know if I was ready to make that sort of decision.  I don't think I would have a problem living on my own, but 1 1/2 hours from anyone I knew?  That would be much different...

The second job just didn't work out, they decided to go ahead with another candidate.  I was extremely disappointed, but I was happy to have had the opportunity to give a demo lesson.  I tried to see the positive in the whole experience, but I'm not going to lie, I was despondent over the thought of having to start again from scratch.  It was still early in the hiring season, but to get so close with two different places and then not have either of them work out is incredibly discouraging.  Plus, by this point, I had sent out 70 applications, and I was forcing myself to search through the paper, stuff those manilla envelopes, and drag myself to the post office.  I wasn't about to give up, though, because I knew I was made of better stuff than that.  This whole story has been about facing one crisis after another, and I knew I could get over this week. 

And sure enough, the following week I was invited to a group interview for a middle school science leave replacement position at a school down the street.  I practiced my responses to some of the trickier questions I was asked during my other two interviews.  I made copies of transcripts, Praxis scores, and letters of recommendation for my portfolio.  I woke up early the day of the interview to research the school.  I even signed up to substitute teach in a middle school science class that week, just so I could get back in the classroom so I may bring pertinent stories and experience into my interview and (hopefully) demo lesson, if they asked for one.  I put every effort I had into this interview, and although I knew it was just for a maternity leave replacement, it was the foot in the door I needed. 

The interview went well, and before I arrived home there was an email in my inbox asking me to come back in for a demo lesson.  My lesson was to be a review of the metric system, and I put together a Powerpoint of tools used for metric measurement, reviewed how I would use the SmartBoard, created a review game and worksheet, and came up with ways I could help students connect the prefixes they saw on the page to measurements in the laboratory.  Afterwards, I met with the vice principal, who admitted he thought I was a strong candidate.  The second demo lesson was being conducted the following day, and the supervisor said she would give me a call afterwards. 

I sat on pins and needles that entire morning.  I was in the car with my parents, about to head down to Hilton Head, and I couldn't put my phone down for a second, in case that was the second in which she called.  I know it sounds silly, but to come so close a third time, to be down to the final two, and then not get it?  Have you ever been so close to something a few times, only to have it all fall through?  I didn't want to think about the dwindling number of job openings in the papers or online, and I wondered if anything would come up for me for the rest of the summer. 

The phone rang, I answered, and I was asked to come work at the school in September.  I immediately agreed, and now plans are underway.  The position is only a 2-month maternity leave, but it's the experience I need to land a full-time position.  Plus, the more I think about it, the more I fall in love with it.  It's a 7th grade life sciences position, the age and subject I'd want to teach.  I will be starting off the year instead of picking up someone else's class.  I'll do back to school night and other beginning of the year events.  I'm already planning out what I will say on the first day of school, how I will lay down the ground rules, and how I will set the tone for the year.  Plus, the position is right down the street, so it couldn't get much better than that when it comes to saving up money.  

Even though I might not have wanted to admit it, I did imagine myself with a full time position for the 2012 - 2013 year.  It sort of reminds me of what I was like during college, where I imagined myself beginning my career right out of school, moving into my own place, and becoming a full-fledged adult by the time I was this age. I had said this before, and I'll say it again, one of the most difficult things about being in your quarter life is that many people do have those expectations for themselves, and when those expectations are not met, you begin to feel as if you're doing something wrong, or that you failed at something.  Enter the quarter life crisis.  

It takes some time, but I have come to accept that whether or not you're living out on your own or have a full time job does not make you any less of an adult.  I am beyond thrilled to be starting this journey, and I'll be sure to keep you updated along the way with more weekend updates!  

Wednesday, June 6, 2012

Easy DIY Beach Coverup and Pinterest Challenge

I've never had a really cute beach coverup.  I've always worn an A-tank and shorts to the beach while other girls will wear pretty dresses.  When I was younger, my mom will tell you that I refused to wear dresses at any cost, but nowadays I like dressing up, even if it's just to the beach.

I have a few summer dresses in my closet, including this amazing maxi dress I bought at the Gap at the end of last season, but I don't have any dresses I can wear over a bathing suit.  Enter the beauty of Pinterest.  Next to my To Make board, My DIY and Craft board is my favorite pinboard on Pinterest.  It has only a few projects, mostly for my future apartment - and later house - but one I had pinned about a month ago is something that is perfect for this time of year.  The pools are open (except for mine), people are taking trips to the beach, and again I am in desperate need of a pretty coverup.

After much backtracking (which unfortunately, is something I do not like about Pinterest) I found the original site that contained a tutorial on how to make this cute little coverup.  I am not one for sewing, except for the minor sewing I have done on crochet projects, but when I saw this wrap I knew it was something I could put together.  Plus, this Pinterest Challenge I found on Topsy Turvy was a perfect excuse to sit down and put this project together for the blog!  I took my first trip to Joann Fabrics, bought some stretchy green fabric, and got to work.

DIY Beach Coverup
Materials
- 2 yds jersey fabric**See note in instructions below on determining how much fabric you'll need**
- thread that matches your fabric
- needle and pins
- sharp scissors
- cloth tape measure

Before you go to the store, you need to determine how much fabric you need.  I'm a 0/2, and I needed 2 yards (6 ft) of fabric.  Basically, you need to take your hip measurement and double it.  And when in doubt, buy more than you think you'll need.  Remember, you'll need some fabric for the straps as well.

Head out to your local fabric store (bring your coupons!) and look for a "Jersey knit."  This is a spandex/polyester blend that stretches, but not too much.  You want a fabric that will be clingy in all of the right places, where a full cotton blend will just fall flat.  Next, head up to the desk to get your fabric cut.  Now, when I bought the fabric it was folded over the spool, which meant that even though I bought 1 yard, I actually ended up with 2.  Also, be sure to hold the fabric up to you to make sure the width will cover you appropriately.  The fabric I bought has a 58" width, which was plenty for my 5'2" stature.

Alright, now that you have your fabric, you need to measure it out.  Hold the fabric behind you (as if you're wearing a cape),


and wrap it around 1 side of your body making sure to bring the fabric to your shoulder blade.  Do the same for the other side (see how the fabric is just about at my shoulder blade in the back?).  Trim the fabric if needed on both the sides and the bottom.


Then, cut out the fabric for your straps.  You want 2 strips, 5 inches wide and 1 yard long (you won't need all of that, but it helps to have extra).  Cut the 5 inch straps into three smaller straps for the braid.  Knot them together and braid, then knot the end.  Make sure you make the braids tight since they will be holding up the coverup!  Do the same for the other 3 pieces.  Set aside.


Next, cut an opening for your underarm.  Fold the fabric in half (hamburger style!) and cut a C in the top corner (not where the fold is).  Then, pin the straps to each end of the C and try it on.  Adjust the straps accordingly.  Then grab your thread, cut a length, loop it through the eye of the needle, double it up, and tie the ends together.  You want to start and end your sewing on the inside of the dress.

Now try it on!  Hold the coverup in front of you, put your right arm through, wrap it around in front, behind and then in front of your body again.  Put your left arm through.  Admire.  Do you want to take more off of the bottom?  Do you want to angle the front?  Or do you love it as is?  To make adjustments, I stood in front of a full length mirror and adjusted the fabric and pinned it where I wanted it to fall, then I'd sew and cut as needed.

To angle the front, fold under the fabric that's going in front of your body so you have a diagonal line from one armpit to the opposite knee.  Pin where you want it to land and then go back and cut.  This step isn't necessary, though, so don't fret over it too much.  The coverup is lovely as is :)  Also, I know this coverup is somewhat daring because the back is completely open, but remember, it's a coverup, you'll be wearing a bathing suit underneath.


This is such a cute and modern coverup.  I love it so much.  And it only cost me $10 to make (with my coupon!) and about an hour's worth of my time (maybe not even!).  Plus, this coverup is ridiculously easy to create, so please don't get discouraged by the sewing!  You don't need to hem anything either since the jersey material rolls at the edges, hiding any sides you may have cut unevenly.  And as always, if you have any questions be sure to leave a comment below!  Thank you again to Topsy Turvy for motivating me to finally make the coverup with this Pinterest challenge!


I'm Topsy Turvy

Also, if you like this project, please share it using the buttons below!  Happy pinning and beachgoing! 

Monday, June 4, 2012

Quarterlette

About a year ago, I decided to start this blog as a means of sharing my quarter life crisis with other readers for the sole purpose of hoping that I was not alone.  I have found some very encouraging words along the way, and writing in this blog has given me a creative outlet and allowed me to pursue some of the things I'm passionate about.  While finding myself, I was able to share my story about learning how to cook and bake (seriously, before this my cooking skills were limited to boiling pasta), crafting special gifts, and honing my skills as an athlete, making myself healthier than I ever have been.  I was also able to share the ups and downs of teaching and the daunting task of finding a job, getting so close, and then being forced to start all over.  But most importantly, I hoped to inspire other young women (and men!) that this is the time in which you must take charge of your life and follow the things you are passionate about.  I honestly do believe this is the path to finding true happiness.

A few months ago, one of the founders of Quaterlette reached out to me and asked if I could share my story.  I immediately fell in love with the idea of the site because it's purpose is to unite young women who are going through their quarter life crisis.  I think the message from the co-founders says it better than I can:


"As three girls in our late-twenties, we have been exposed to endless stories 
from our friends about the difficulties that come along with this life stage. 
We’re old enough now where we have expectations for ourselves.  
We feel like we’re supposed to have an exciting job, 
a decent income, a cozy home and a fulfilling relationship.  
And if we don’t, we tend to feel incredibly lost.

However, while this time can be difficult and confusing, 
it can also be incredibly rewarding and life-changing as well.  
Some may call it the “quarter-life crisis” – we prefer to think of it as a tricky 
and exciting time full of changes, transitions and decisions. 
We’ve had exceptional and memorable days during our twenties, 
but we’ve had some challenging and anxiety-filled days as well, 
as we are constantly trying to weave together who we think 
we should be and who we want to be with the reality of who we are."


See? I could not have said it better myself.  When I read this, I knew I wanted to be a part of this platform, since these are all of the feelings I have had for the past 2 years.  I wrote up an essay and submitted it to these women, and I will be featured on this website sometime in the upcoming weeks.  I am incredibly excited to share my story with other Quarterlettes and hope to continue to inspire others to take that chance to make a change in their lives for the better. 

Many of you have expressed that you went through or currently are going through your quarter life crisis as well.  I ask that you share this site with your friends and family so that we can all realize that we do not go through this stage alone.  Even if you are not going through a quarter life crisis, the stories on this site are truly inspirational.  Please read and share, and I'll be sure to let you know when my story will be published!  

And thank you to everyone who has followed my story for the past year, I cannot express my gratitude for all of your kind words and support. 


Friday, June 1, 2012

Pina Colada Doughnuts

Happy National Doughnut Day friends!  And what a joyous day this is!  Now that I am out of student teaching and have my days free, which means I have more time to spend on recipes, which results in more exciting and delicious things to create!  Plus, I think it's incredibly important to pursue one's interests, and although I'm currently working part-time, I'm glad I have a little more time to devote to the things I love.

Like doughnuts.

My absolute favorite doughnut is the Entenmann's chocolate frosted doughnut.  Whenever they're 1/2 off at Shop Rite I'll always get a box.  And eat the whole thing because no one else in my house will eat doughnuts.  When I bought my box of Entenmann's this week I noticed that today is the Salvation Army's National Doughnut Day.  This day was founded to commemorate the "Doughnut Lassies" who would serve doughnuts to the soldiers during WWI.  It was a way to raise funds and awareness of what the Salvation Army was doing for soldiers and other families who have fallen on hard times.  You can read more about Doughnut Day here, as well as other things you can do to support the Salvation Army.   Something as simple as donating your clothes after a spring cleaning could do a lot of good.

For National Doughnut Day, I wanted to make a doughnut that I know people in my house would eat.  Another recipe from my "To Make" board can now be crossed off - Pina Colada Doughnuts by Cherry Tea Cakes.  It's been about 90 degrees this entire week so I thought a nice, refreshing pina colada doughnut would be perfect for today.

The last doughnuts I made were doughnut holes, mostly because I didn't have enough time was too lazy to roll and cut the doughnuts out myself.  Again, I have a lot of time on my hands, so I was looking forward to a big cooking/baking project.  And believe me, these doughnuts are so worth your time!  To be honest, the process is done in about 30 min increments, so it does not seem like a lot of effort at once.  Just make sure you plan your time out accordingly.

Scalding the milk may seem like an unnecessary step, but it does help the dough rise by denaturing the proteins that inhibit the rising process.  Science!  This is where having a candy thermometer comes in handy, as you want to heat the milk to about 180 degrees F before removing it from the heat.

Also, when you're adding the flour to the dough, you want to add the last cup in about 1/4 cup increments.  This will prevent you from adding too much flour at once, plus it makes the dough easier to mix.  You want the dough to be sticky, but not so sticky that it doesn't come off your hands.

Speaking of sticky doughnuts, I was having a lot of trouble with these when I went to put them into the oil. They were sticking to everything and lost their shape.  To combat this, pat the doughnuts down gently after they have risen the second time, and keep them in the refrigerator just until you're about to put them into the oil.  That should help them hold their shape a little better in this heat and humidity.

To transfer the doughnuts to the oil, I would lift the doughnuts up gently around the edges,


place onto my slotted spoon,


and use the spoon to transfer the doughnuts into the oil.  I didn't get sprayed with hot oil once!  Frying things is so easy it's slightly terrifying.  Like, I want to do this all of the time.

While making the glaze, don't worry if it seems a little thin; the glaze will thicken up upon standing.  And make sure you sift your powdered sugar!  It will make incorporating the sugar into the melted butter much smoother.  Top with shredded coconut and you're all set!

These donuts are delicious without the glaze, but the glaze is what really makes it a pina colada doughnut.  The outside is crispy but the inside is soft and fluffy - absolutely perfect.  This is a really special treat to have around the house or to serve at a summer party.  Plus, you can make this recipe in increments, so even though it may seem like a big project, it's much more manageable when you break it down.  The donuts are best the day you fry them, so take about 30 minutes to fry them up the day you're planning to serve them.  Happy Doughnut Day everyone!

And yes, I filed these under "breakfast."

Pina Colada Doughnuts
Yield: about 18 doughnuts
Prep time: 3 hours (including rise time)
Cook time: 3 min per doughnut

Ingredients
For the doughnuts
-     ¼ oz package yeast
-     ¼ c hot water
-     ¼ c sugar
-     ¼ c shortening
-     ½ c milk, scalded and cooled
-     ¼ c pineapple coconut juice blend
-     ½ tsp salt
-     1 egg
-     4 c flour
-     canola oil, for frying
For the glaze
-     2 tbsp butter
-     1 c powdered sugar, sifted
-     ¾ c pineapple coconut juice blend
-     Shredded coconut to garnish

Directions
Dissolve yeast in hot water.  Cream together the shortening and sugar.  Add the scalded milk, juice blend, salt, and egg.  Add the flour about 1 c at a time and incorporate completely after each addition.  For the 4th c of flour, add the flour about ¼ c at a time and combine using a spatula or your hands if necessary.  You want the dough to be slightly sticky, but not so sticky that it doesn’t come off your hands.

Lightly oil the bowl and the surface of the dough.  Cover the bowl and let the dough rise at room temperature for about 60 minutes.   While the dough is rising, boil down the pineapple coconut juice to make the syrup for the glaze.  Keep the juice over low heat so it is barely simmering.  You want to reduce it to about ½ c, which should take about 30 min.

Turn dough onto floured surface and roll to about ½ in thick.  Cut with floured cookie cutters (I used a piping tip and a large glass…).  Place the doughnuts and doughnut holes on a baking sheet lined with a silicone mat or parchment paper and cover.  Let rise for about 30 – 40 min. 


While the doughnuts are rising, make the glaze.  Melt the butter and remove from heat.  Stir in powdered sugar until incorporated.  Stir in the pineapple coconut syrup about 1 tbsp at a time until the glaze has reached the desired consistency (it'll thicken up when you let it sit).  Set aside.

Heat the oil in a medium sized pot to 350 degrees F.  Slide the donuts into the oil using a slotted spatula/spoon.  Fry until golden brown, about 3 minutes.  Remove from oil and allow to dry on a plate lined with a paper towel.  Once cool enough to touch, dip the doughnuts into the glaze (you may need to reheat it) and allow to cool completely on a wire rack.  Garnish with shredded coconut.

Adapted from: Cherry Tea Cakes