Showing posts with label tennis. Show all posts

Monday, June 18, 2012

Hilton Head Island: Things to Do

Hilton Head has been my family's vacation spot for the past 5 years.  I have always loved going there, relaxing on their beaches, riding my bike all over the island, and eating more fried seafood and drinking more sweet tea than my body can handle (don't ask...).  When I tell people about Hilton Head, some people actually have no idea what I'm talking about, while others express their desire to go there someday.  In order to help those that want to go to Hilton Head one day (and maybe convince those who have no idea what I'm talking about), I want to share some of my family's favorite things to do and see, and places to eat of course.  I'll be splitting it up into two posts, though, because it's much too much to put into one.  So first, I would like to share some things you and your family need to do while on Hilton Head Island.

Renting Bikes


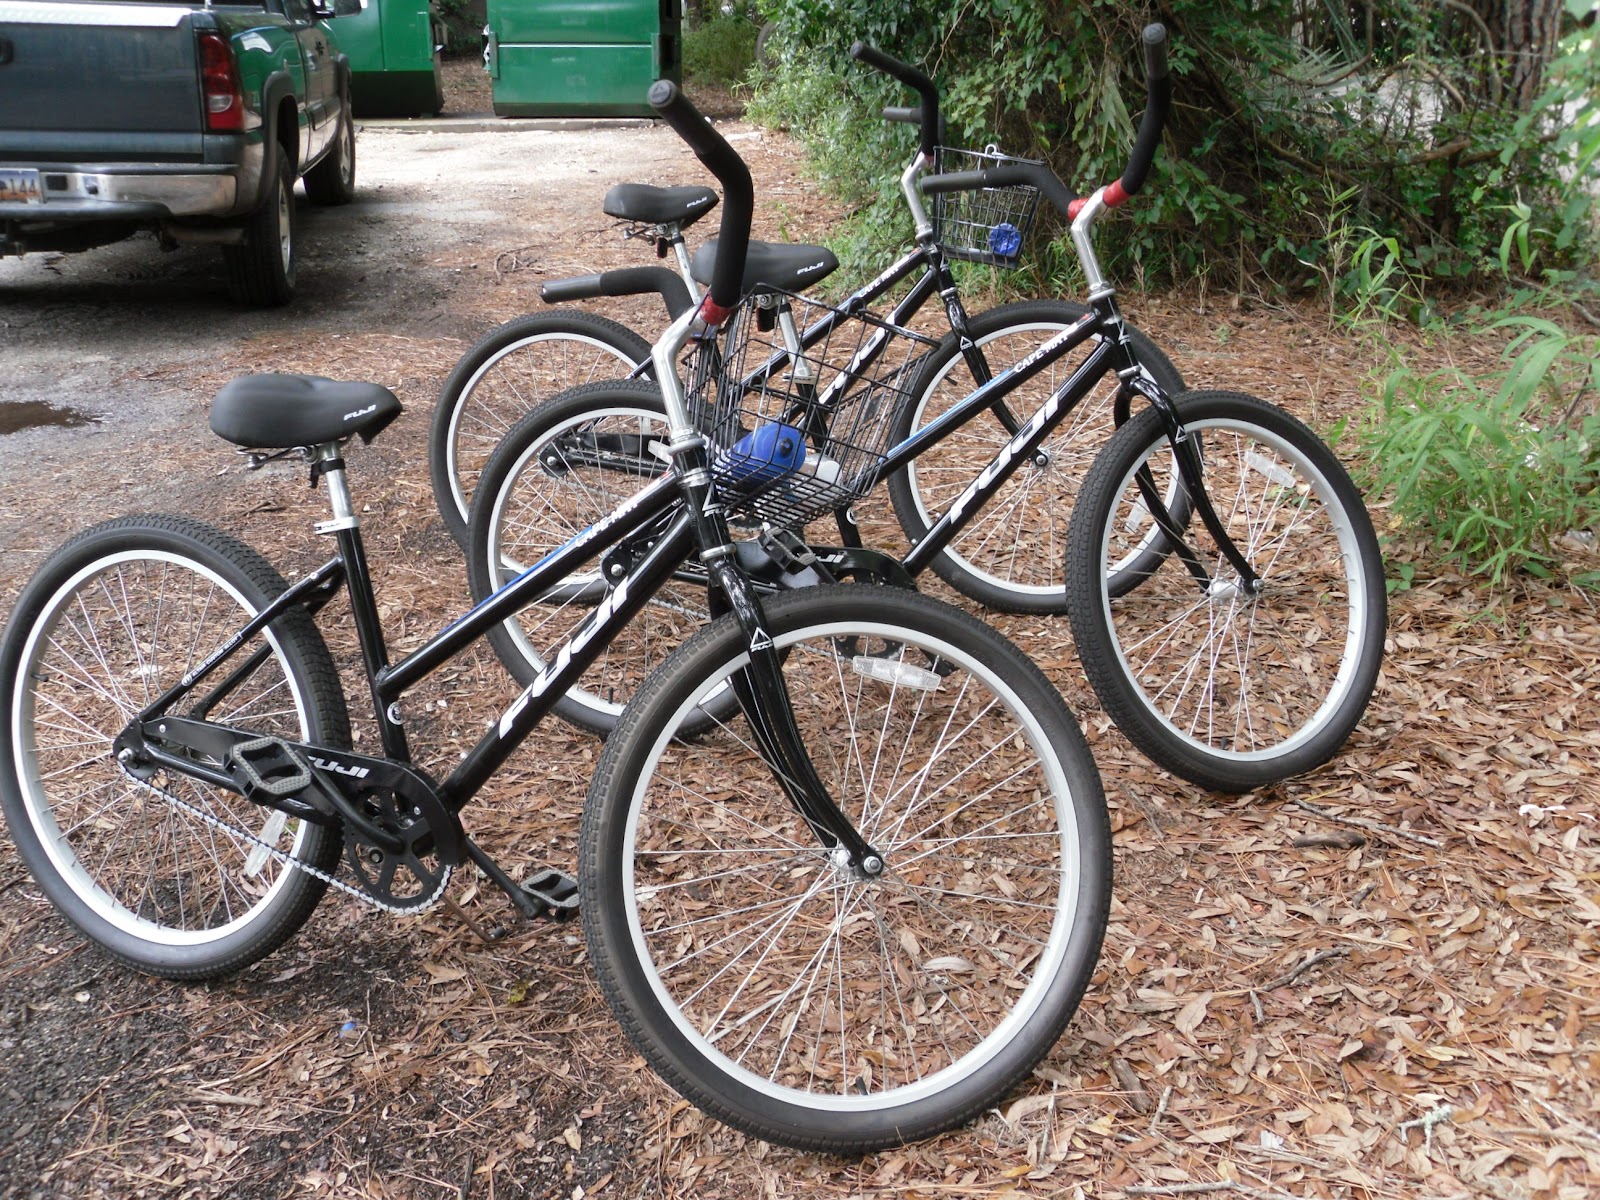
The first thing you need to do when you arrive at the island is rent bikes from one of the local bike shops.  You can even find some bike shops that will deliver and pick up the bikes for you!  The island was made for bikers, and there are paths all over the island that are wide enough for two lanes of bikers, riding single file.  When you head out, be sure to grab a map of the bike paths, although there will be some maps posted up at various points throughout the island.

Biking is also the best way to view the island, both on the mainland and on the beach.  If you'd like to take the bikes on the beach, make sure you go at low tide, and keep the bikes out of the water!  The salt water will rust the wheels and spokes and some companies will charge if they've noticed you've taken the bikes in the water.  If you go during low tide, though, you should have no trouble at all.  The sand is packed so it is like riding on asphalt.  Except there's one thing: when you start riding, make sure you're riding against the wind.  That way, when you ride back, the wind will be at your back and it'll make for a MUCH easier ride.  Trust me on this one.


On the mainland, be sure to stop at some of the bridges and take a look at the gators and turtles in the ponds.  The turtles will come right up to the bridge because they're so used to people feeding them (please don't), but you'll have to look closer for the gators.  Please be smart and stay on the bridge while you view the gators, although most of them are still pretty small.  I heard a rumor last summer that they take the largest gators off the island.  However, the Sea Shack does serve alligator...and speaking of the Sea Shack, be sure to grab your bike locks and bike to a local restaurant for lunch.

Savannah, Georgia

It's hard to believe that Hilton Head is right across the water from Savannah, Georgia.  Therefore, this is a destination you cannot miss!  I could spend a whole series of posts on Savannah, but instead, I'm going to tell you about the places my family visited this year.

First, though, I must say that one of the best ways to see the city is through a trolley tour.  Sure, it's incredibly touristy, but the trolley tours are run very well and they will bring you to all of the spots you should hope to visit while in Savannah.  Make sure you book with a company that allows a hop on/hop off system, so you can walk around the city at your leisure as well.  My family and I did this last year and we loved it.

Now, some of you may know that I am a Paula Deen fan.  I love her story, I love her cooking, and I love her personality.  She's a riot to watch and she knows her food isn't good for you, it's just good.  Therefore, we just had to make a reservation at her restaurant.  Before I went, I checked some reviews out of curiosity's sake, and to be honest they were not pleasant.  The problem is, people see a celebrity chef and expect celebrity, gourmet food.  Do not go to Paula's restaurant expecting that.  She's going to serve what she makes on TV - down to Earth, greasy, fried, delicious comfort food.

Make sure that if you do visit The Lady and Sons, you make a reservation.  Even with a reservation, you'll need to wait in the waiting area for a short while.  But the waiting area is next to the gift shop (Paula knows how to market herself), so take the time to look through the cookbooks and decide whether or not she actually did sign each one of them...

The waiter comes out with a tray of garlic and cheddar cheese biscuits (amazing) and hot cakes and will give you one of each.  The menu isn't too large, but there are some very tasty options.  I decided I wanted a whole smattering of Southern foods and chose to go for the buffet.  My mother and brother ordered pulled pork sandwiches, which they said were wonderfully seasoned and tender.  The items from the buffet are the classics you find on her show: fried and baked chicken, greens, black eyed peas, mashed potatoes, creamed corn (my fave).  There's nothing that will knock you out of the park, but it is comfort food at its finest.  There's also a little salad bar in the buffet so you don't feel totally guilty about the things you're eating.  The waiters make sure to keep your sweet teas overflowing, and will even send you home with a drink to go.


Not only did the buffet include classic Southern comfort foods, but it included desserts as well and I had been eyeing Paula's Gooey Butter Cake, which I saw in her menu and could not get out of my mind the entire time we were there.  When the waiter brought around the dessert selections, I saw the butter cake was actually a chocolate butter cake, and sensing I was a little disappointed the waiter offered to find the original kind.  He brought out a small square for me and I started nibbling on it immediately.  The cake is everything I wanted and more - a caramelized base, gooey center, and a light crust.  I left a tiny bit for my family to try, and was barely able to snap a picture of it before they devoured it.

The Lady and Sons is certainly a tourist destination, but it's much more agreeable than the reviews all said.  The waitstaff is incredibly friendly, and if you're lucky enough to be seated on the second or third floor the atmosphere is very nice.  Don't go in expecting celebrity worthy food - go in expecting the things you see on Paula's show - down to Earth comfort food.  You will not be disappointed.  And plan to do some walking afterward, your stomach will thank you.  And no, that is sadly not the real Paula Deen, because if it was I would probably be crying in that picture.  Does anyone else have that reaction when they see celebrities?

Afterwards, be sure to hit the City Market to eye the treats at the Candy Kitchen and check out some local artists.  The waterfront is beautiful as well, yet we had to miss it this trip due to the rain.


Kayaking in the Low Country

One thing you cannot miss when coming to Hilton Head is the kayaking.  Many companies boast kayaking or boating tours in which you can spot dolphins.  If you've never been kayaking before, I would suggest taking a kayaking tour, more for safety reasons than anything else.  If you have been kayaking before, go ahead and rent the kayaks by the hour and go dolphin hunting on your own.  One place that my family and I like to go to is Outside Hilton Head.  It's almost impossible to get to, since it's tucked away in the Shelter Cove Harbor/Resort, but it's really worth it.  Keep following signs for Elia's Grill and you'll find it.  The reason we love this particular company is because of the location.  There are lots of marshes for you and your family to explore, and every time we went we managed to find dolphins!  The dolphins will come fairly close to your boat, but don't do anything silly like trying to grab/feed them or sticking your hands in the water.  Even if you don't see dolphins, my family and I loved paddling through the marshes and looking at the crabs, fish, and birds.  Also, make sure you get there early so you can see lots of animal action and assure there will be a kayak waiting for you!

Sea Pines

Sea Pines is a gated community on the south tip of Hilton Head Island.  It does cost $5 to get in, so make sure you get there somewhat early so you can get your money's worth.  As you're driving down N Sea Pines Drive, you're going to come up to Lighthouse Road on your right.  If you take that, it'll take you to the lighthouse and Harbour Town, which is a beautiful spot to walk around, snap some photos, and see the lighthouse and boats.  This is also where the Crazy Crab is located, as well as a few other notable restaurants.  This area is also ideal for its shopping, and it's where you're going to want to pick up your souvenirs.  Should you continue going straight down N Sea Pines Drive, you'll eventually end up at the Salty Dog - a place you must visit if you have a salty dog back at your hotel/villa or back home.  They have souvenirs for your pup and you, and last year we bought Shadow a very nice collar. My family and I visited the Wreck at the Salty Dog for some bar food, and it was pretty decent.  Make sure you get the outdoor seating - this restaurant is at the very bottom of Hilton Head Island!


There are of course places you can play tennis and golf (I know for a fact there are free tennis courts), charter boats and go on fishing expeditions, or just simply relax on the beach.  There are a myriad of things to do on Hilton Head, but I wanted to highlight some of my family's favorites.  I hope they become your family's favorites as well!  Check back Wednesday for the second part: places to eat!

Tuesday, September 6, 2011

Grilled Pizza

When we were in Cape Cod, my friends and I attempted to save as much money possible by making all of our dinners at the house.  One of my favorite and most memorable dinners was when we made grilled pizzas.  My friend Brittney and I both love to read food blogs (just check out my blogroll on the right) and throughout the summer we saw many, many posts that raved about how much better pizza tasted when it was grilled, so we thought we should give it a shot since the house came with a grill.  The dinner was a huge hit, probably even more so than the lobsters and steak we had another night, and everyone had a really fun time making their own pizzas.  I wanted to recreate this experience with my friends at home before the summer was over, so I chose the last day of summer to host a pizza making party at my house.

Our bracket
The day actually started off with a tennis tournament I organized with my friends.  What started with a group of four people who played tennis last summer (not including myself) has turned into a huge clinic where more experienced players will help each other and battle each other in heated matches to see who is the best.  We had mentioned doing a tournament this summer so we could figure out where everyone ranked, so I found out what day of this past weekend worked best for everyone, ranked them based on how well they performed over the summer, and set up a bracket so that people could play against each other to see where they ranked amongst our friends.  We're a pretty competitive bunch so the tournament was a huge hit.  One of our friends has this amazing knack for tennis so he crushed everyone 6-0 or 6-1 (we only played 1 set per match), but everyone else who fell in the middle of the rankings had some really amazing and intense matches.  All in all, the tournament was a huge success and we hope it will become something we can do at the beginning and the end of the summer annually.  Needless to say, after a 4 and 1/2 hour ultimate practice on Sunday and a three-round tournament yesterday, my legs are completely destroyed.

Alright, so back to the grilled pizza.  When planning for your grilled pizza party, the first step is to make the dough.  Here is the recipe I used for the dough:

Pizza Dough
Makes about 3 pies

Ingredients
- 1 ½ c water, lukewarm
- 2 ¼ tsp active dry yeast (1 ¼ oz packet)
- 4 ½ c flour
- 1 tsp salt

Directions
Pour packet of active dry yeast into lukewarm water and whisk with a fork until the yeast is dissolved.  Let sit for about 10 minutes to activate the yeast. 

Dissolve the yeast in lukewarm water
Combine flour and salt in a large bowl and form a well in the center of the flour.  Pour the water into the well and, using your hands or a dough hook on an electric mixer (not a beater!), mix the flour and the water together.  When combine, transfer half of the dough to a floured surface and knead until the dough is smooth and elastic, not sticky.  Repeat with the second half.

If using immediately, place the balls of dough in a bowl.  If not using immediately, the dough can be placed in a plastic bag or Tupperware container in the refrigerator for 48 hours or frozen.  Do not leave uncovered if placing in the fridge or freezer. 

Adapted from: The Kitchn


Sticky dough - not what you want
The dough is going to be incredibly sticky when you first combine it with the water, kind of like a giant wad of bubblegum.  Do not despair!  When you're kneading it on the floured surface, just continue to work flour into the dough until it no longer sticks to your hands.  When the dough is ready it will be smooth and not tacky.  It is also easier to work with the dough if it is in a smaller portion, so be sure to work with only half of this recipe at a time.  When I tried to knead the entire batch of dough, the outside would be smooth but the inside of the ball would still be very sticky.  This recipe makes a lot of dough, but you can always freeze it to be used at a later date, or to be used immediately if you have to make 11 individual pizzas...

The next step is to make the sauce.  If you have read even one food blog this past year I am sure you have read about this pasta sauce.  Food bloggers have obsessed over it and how something so simple could turn into such a rich, velvety sauce.  It's three ingredients: crushed (or whole) tomatoes, butter, and an onion that sacrifices itself for the sake of the sauce.  You cut an onion in half, place it in the pot, and then throw it out at the end.  So in actuality, this sauce is just tomatoes, butter, and essence of onion.  This sauce is so simple you will wrack your brain trying to figure out what makes it so tasty.  Just accept it, and make this sauce.  Oh and to make this sauce even better, if you use crushed tomatoes rather than whole ones, you can skip the step in which you stand over the pot and crush the tomatoes with a wooden spoon and just plop the ingredients in, set it on low heat, and let the sauce simmer for 30 minutes.  I honestly cannot get over how easy and delicious this sauce is.  It worked great as a pizza sauce but can of course be used on pasta.  And please resist the urge to throw in a sprinkle of sugar or dried herbs or minced garlic when making this sauce.  You want to make it as is and once you do, you'll be very happy you did.

3-Ingredient Tomato Sauce

Ingredients
- 1 28 oz can crushed tomatoes
- 5 tbsp butter
- 1 onion, ends cut off and halved with outer skin removed

Directions
Combine all ingredients in a large sauce pan and place over medium heat.  Bring the sauce to a simmer, stirring occasionally, and then lower the heat so the sauce is barely simmering.  Simmer for an additional 30 minutes, stirring occasionally.

Adapted from Smitten Kitchen 

The third step is to make the toppings.  Here is a very special note about the toppings: any toppings that need to be cooked need to be cooked ahead of time.  The pizza will be on the grill for about 10 minutes and it cooks from the bottom up, so it will not cook raw meat or poultry.  If you have any vegetables, like onions or mushrooms, that you would like cooked, that needs to be done ahead of time too.  Once you have all of your toppings, set them up in plates or bowls on a table near the grill.  This will make the grilling process much easier. 

Now that you have all of your ingredients together, the final step is to grill the pizza!  Once everyone arrived, I called them into the kitchen and gave them each a ball of dough about the size of a baseball.  Everyone used a different method to spread out the dough: some of them pulled it apart in their hands until they got a rough circle while others flattened it out on a plate.  When you flatten out the dough it is going to look small and thin, but keep in mind that the crust is going to rise a lot and it will be very filling, regardless of how small it looks on the plate. 

The left side of the grill is on medium-low heat,
the right side is on medium heat
After everyone had their dough ready, we took the party outside to the grill.  Next to your grill, have a bowl of olive oil with a brush, the pizza sauce, the cheese, and two spatulas.  When you heat your grill, heat one half on medium heat and the other half on medium - low heat.  This will make sense in a minute.  Have the first person put his/her dough on the medium heat side of the grill, and don't worry it's not going to fall through the grates.  Once the underside of the crust becomes browned and slightly charred, flip it over to the medium-low heat side of the grill (at this point the second person can start their pizza).  You want the pizza to finish cooking on the cooler side of the grill so that the toppings have time to meld together.  Because the pizza cooks on the underside only, you want to add the cheese followed by the sauce, meats, and veggies.  This will make sure the cheese gets nice and melted.  Remove once the underside is browned.

Have the toppings ready to go!
The grilled pizzas were well received by everyone.  Grilling the crust makes it extra crispy, something that is hard to replicate in an oven.  Plus the whole process should only take about 10 minutes per person, so having your toppings ready and your sauce and cheese next to the grill will help ensure that you get everything on your pizza before it's done cooking.  If you're having a party, it's a really great interactive way to include everyone, plus it can be used for any age group.  My 20-something friends contributed some really delicious toppings, but younger kids will also get a kick out of making their own dinner by hand.  I know summer is over, but for those of you who are still in denial like myself and are cringing at the pumpkin and halloween recipes on everyone's blogs (come on guys, it's September 6th), it's a really fun dinner to make with friends and family.  Enjoy!

Thursday, July 14, 2011

The Right Equipment

Last week, after much advising (heckling?) from my brother, I caved and decided to drop some real money on a professional tennis racket.  I went to Dick's to look at some rackets to see what size handle I should get, and even though I didn't leave with a racket I did leave with a pair of shorts with pockets.  For WEEKS I had been searching for tennis shorts with pockets.  I went to Sport's Authority, TJ Maxx, Marshall's (where 2 friends found their tennis shorts), Modell's, and Dick's twice.  The second time I was at Dick's, I asked a woman if they had shorts with pockets, got a negative response, and went to look for a hanger to attack someone with (believe me, after 3 weeks of searching you'd be frustrated too).  I absentmindedly began flipping through another rack of shorts when all of a sudden I noticed something: these shorts had pockets.  I couldn't believe it.  And then showed the employee and she couldn't believe it.  And then I told the people at the cash register that they had to keep these shorts in stock because I would be back to buy more.

For those of you who also suffer from the fact that manufacturers don't believe women need pockets in their shorts, these are the ones I got (mine are blue).  They were in the training section.  Who knew?

Anyways, this post isn't about those shorts (or maybe it is), it's about having the right equipment for when you play.

For weeks I was playing with a tennis racket that was too small, had dead strings, and the grip tape was peeling off.  I thought about getting the racket restrung, but my brother's friend who was going to do it said he'd probably snap the racket because I was yet again playing with a youth racket.  That following week, my brother's friend led me to tennis warehouse and I immediately went to the sale section.  I picked mine based on weight, size of the head, and (of course) color.  I absolutely fell in love with this racket - it was the perfect size and weight and had the right specs and it looked awesome.  And it was $80 off!  Even though it was still $70 but what ever it was $80 off!  I ordered it and had it strung with these nice strings and it finally came in the mail yesterday.  So, I grabbed my friends and hit the court today.

Although it didn't make me play like I pro (I'm not going to lie, I was kind of wishing it would), almost all of my balls were making it over the net.  The racket took the impact of the ball, leaving less pain in my elbow and shoulder.  I felt like I had more control and my swings were coming easier, plus playing with a new fancy racket gave me a lot of confidence.  It was like I was in Ollivander's shop picking out a wand and I found one that chose me, that worked for me, and I performed well with it.  Ok that's a little corny but I have Potter-fever.  You'll benefit from this fever as well, I have something Harry Potter related planned for this weekend!!  But, more on that later.

Moral of the story - if you're going to invest a lot of time into something, you will not regret putting the money down for some great equipment.  After using this new racket, my shoulders, elbows, and forearm are not as sore as they normally are, my hits were looking relatively better than before, and I had slightly more control (something that will definitely come with practice).  Making sure you have the right equipment is important for all sports and activities.  Would you go running in a pair of old Converse?  Or would you go biking without bike shorts (believe me, that's an experience no one would want to have)?  Or would you play football with cheap pads?  Ok you get the point: the right equipment will change your game immensely.  And look at it this way - if you put a good amount of money down for your new equipment, you'll definitely be motivated to get a lot of use out of it.  I will be playing tennis for the next 2 days.

Monday, June 6, 2011

Tennis

One thing that I love about this blog is that I am at the "beginner" level of some of the things that I post about, tennis being one of them.  I hope that you, as readers, get something out of these beginner posts so that if you try to pick up something new or something you haven't played in a while these tips will help you get started at a more accelerated pace.  I've played tennis maybe 4 or 5 times now (I used to play when I was younger) and I think I'm finally starting to get the hang of it.  Today, I played one-on-one with a good friend who also doubles as a great tennis coach.  Because it was just the two of us, he really helped me with my forehand and backhand swings as well as my control.  First, we warmed up and just volleyed the ball back and forth.  Then, we decided to play a game, to which I lost 6-0 (I did score 1 point).  After that, he had me hit the tennis ball against a fence to work on my control (aim and power).  But the thing that worked best for practicing my control was when we played in one of the half court boxes, otherwise known as mini tennis.  He told me to aim within that half court mini box and every time it went long or wide we'd start again.  After about 15 minutes we had some really great volleys going and my forehand looked pretty good.  I was able to gauge how much power I needed to put in my swings and how I should hold my racket in order to get the ball where I wanted it to go.  We then switched to backhand and I worked on only swinging with one hand rather than two (it just feels more natural to me).  After about two hours and a few great volleys under our belts, we decided to call it a day.

I would like to provide some tips for beginners or even advanced beginners in order to improve your game.  Some of this may come obvious to most, but I would hope that someone would find these tips helpful.  As I discover ways to make myself a better and more competitive tennis player, I hope to document the things I changed about my technique and my form so that others may decide to pick up this exhilarating sport.  I feel new things are less intimidating when you have some tricks of the trade at your disposal :)

Always keep your feet moving
This is one thing that should have come naturally to me since I always try to stay on the balls of my feet whenever playing ultimate.  My friend told me that my feet should never be in the same position for each swing, and once that clicked for me, my swings became much better.  Also, when your feet are moving your brain is engaged and you are more likely to have some pretty good hits if  your whole body and your mind is in motion.  A stagnant player will not hit the ball well even if their feet are in the right position.

Quick tips:
- If the ball is coming at you, take a few steps back rather than choking up on the racket.  This will give you a fuller swing, which will result in more power and accuracy.
- Keep your feet perpendicular to the net.  I found that if my hips were square to the net, the ball would go off to the side because my arm would follow my body.  When I swing, I step with my front foot in the direction that I want the ball to go (which by the way is exactly what you do when you throw a frisbee).  If you're on the balls of your feet and ready to move when that ball comes over the net, you'll have more time to get a good position on the ball.
- Always return to the middle of the court after a swing.  You may be running more than necessary, but if your opponent hits the ball across the court, you want to be in a good position to go after it.  It's also much easier to run forwards than backwards so if your opponent hits a short ball you can charge the net rather than run after it.  However, if your opponent hits the ball towards the back of the court, you want be far enough back so you have time to run onto it.

To summarize, make sure that you're feet are always moving so that you can position yourself perpendicular to the net so that the ball comes to your side and you're facing it, ready for your swing.

Let the ball come to you
This is something that I had A LOT of trouble with when I first started playing tennis because it is against everything I have ever learned when playing a sport.  In frisbee, if you don't charge that disc, someone else will knock it right out of your path.  So, when I first started playing tennis and the ball was coming towards me, I would run straight at it and then have to hit it with this weird overhand swing, which either sent the ball flying or straight into the ground (on my side of the court).  So today I practiced waiting for the ball to come to my side.  When I knew approximately where it was going to reach its peak after the first bounce, I would make sure my hips were square to the ball and my feet were perpendicular to the net.  Then, I'd take my swing when it looked like the ball was at its peak.  It was so difficult for me to wait for that ball, but my swings improved drastically once I did.  So again, square your hips to the ball, keep your front foot in the direction you want the ball to go (your feet should be ready because they've been constantly moving), and swing level.

Speaking of swinging level, that's another problem I had when I first started playing.  This was fixed immediately, though, once I realized that when I cocked my racket back, I would twist my wrist so that my palm was facing me, which would tilt the racket up and out, which is where the ball would go when I hit it.  Once I kept my palm down when my racket was cocked back, my swing would be more level and the ball wouldn't go up in the air or off to the side as much.  My backhand still needs some work, and I've been fooling with whether or not I want to swing my backhand with two hands (like a baseball bat) or with one hand.  What seemed to work with me was when I approached the ball with two hands but only used one hand on my follow through (it's just much more comfortable for me).

So to summarize again, when that ball comes at you, square your hips to the ball, make sure your arm's length away from it, your front foot is where you want the ball to go, and swing.  It takes a ton of practice but you'll start to feel really good once you get some good volleys going.

I really do like playing tennis.  Chasing down that ball and getting a nice level hit over the net is exhilarating.  And I love the sound the ball makes when it hits the racket right in the center.  The weather is supposed to be in the mid 70s for the next week or so in my area, so grab a $30 racket from Dick's or Sports Authority and hit the court with a friend.  When you start, practice close to the net and play in one of the half boxes like we did today, and as you get more confident in your hits and your accuracy improves, start to back up a little.  Next time we play one-on-one we'll play half court, which is one of the small boxes up close to the net plus the large rectangular box in the back of the court.  And remember, keep on the balls of your feet, let the ball come to you, and get your feet and hips in position before you swing.  Get out there and have some fun :)